Log in

Segments

Segments are a vital tool for user analytics. A segment is a group of users identified using certain parameters, e.g. who brings in most revenue or signs up with an old iPhone.

As MyTracker's analytics tool, segments cover all the options for working with a product audience:

  • analyze the size and evolution of individual user groups;
  • choose the target audience who'll see your ads;
  • pass user and device identifiers belonging to the segment to your own analytics system or partner;
  • build segment reports of any complexity free of excessive data.

MyTracker segments

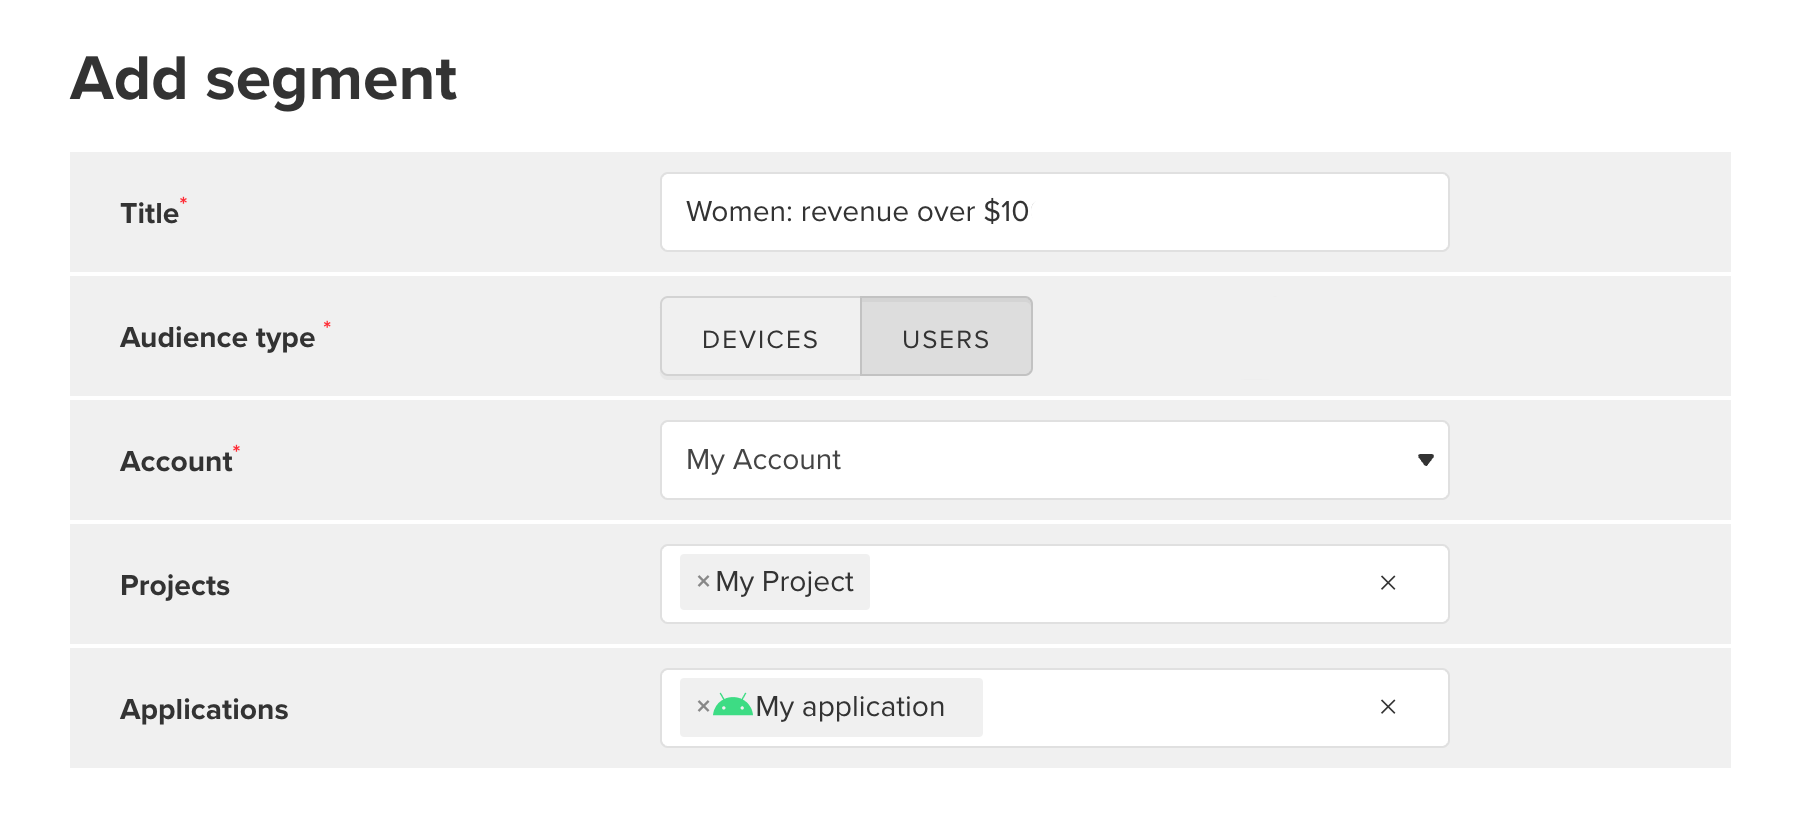
A segment can be built for an individual app or the entire project based on both device or user parameters. Segmenting criteria depends on segment audience type and may be as follows:

  • Geography and demographics (gender, age, country, region, city)
  • Device information (manufacturer, model, OS version)
  • App information (platform, app version)
  • Connection information (connection type, mobile telecom brand)
  • Activity (new and active audience, session count, average and overall session duration, registrations, authorisations)
  • Finance data (product, revenue, purchases count, and sum)
  • Fraud metrics (e.g. stacking clicks)
  • Ad monetization (engaged audience)
  • Subscription information (first and paid subscriptions)
  • Traffic source (campaign, partner)
  • Custom events (e.g. product delivery, levelling up)
  • Period (fixed or moving)

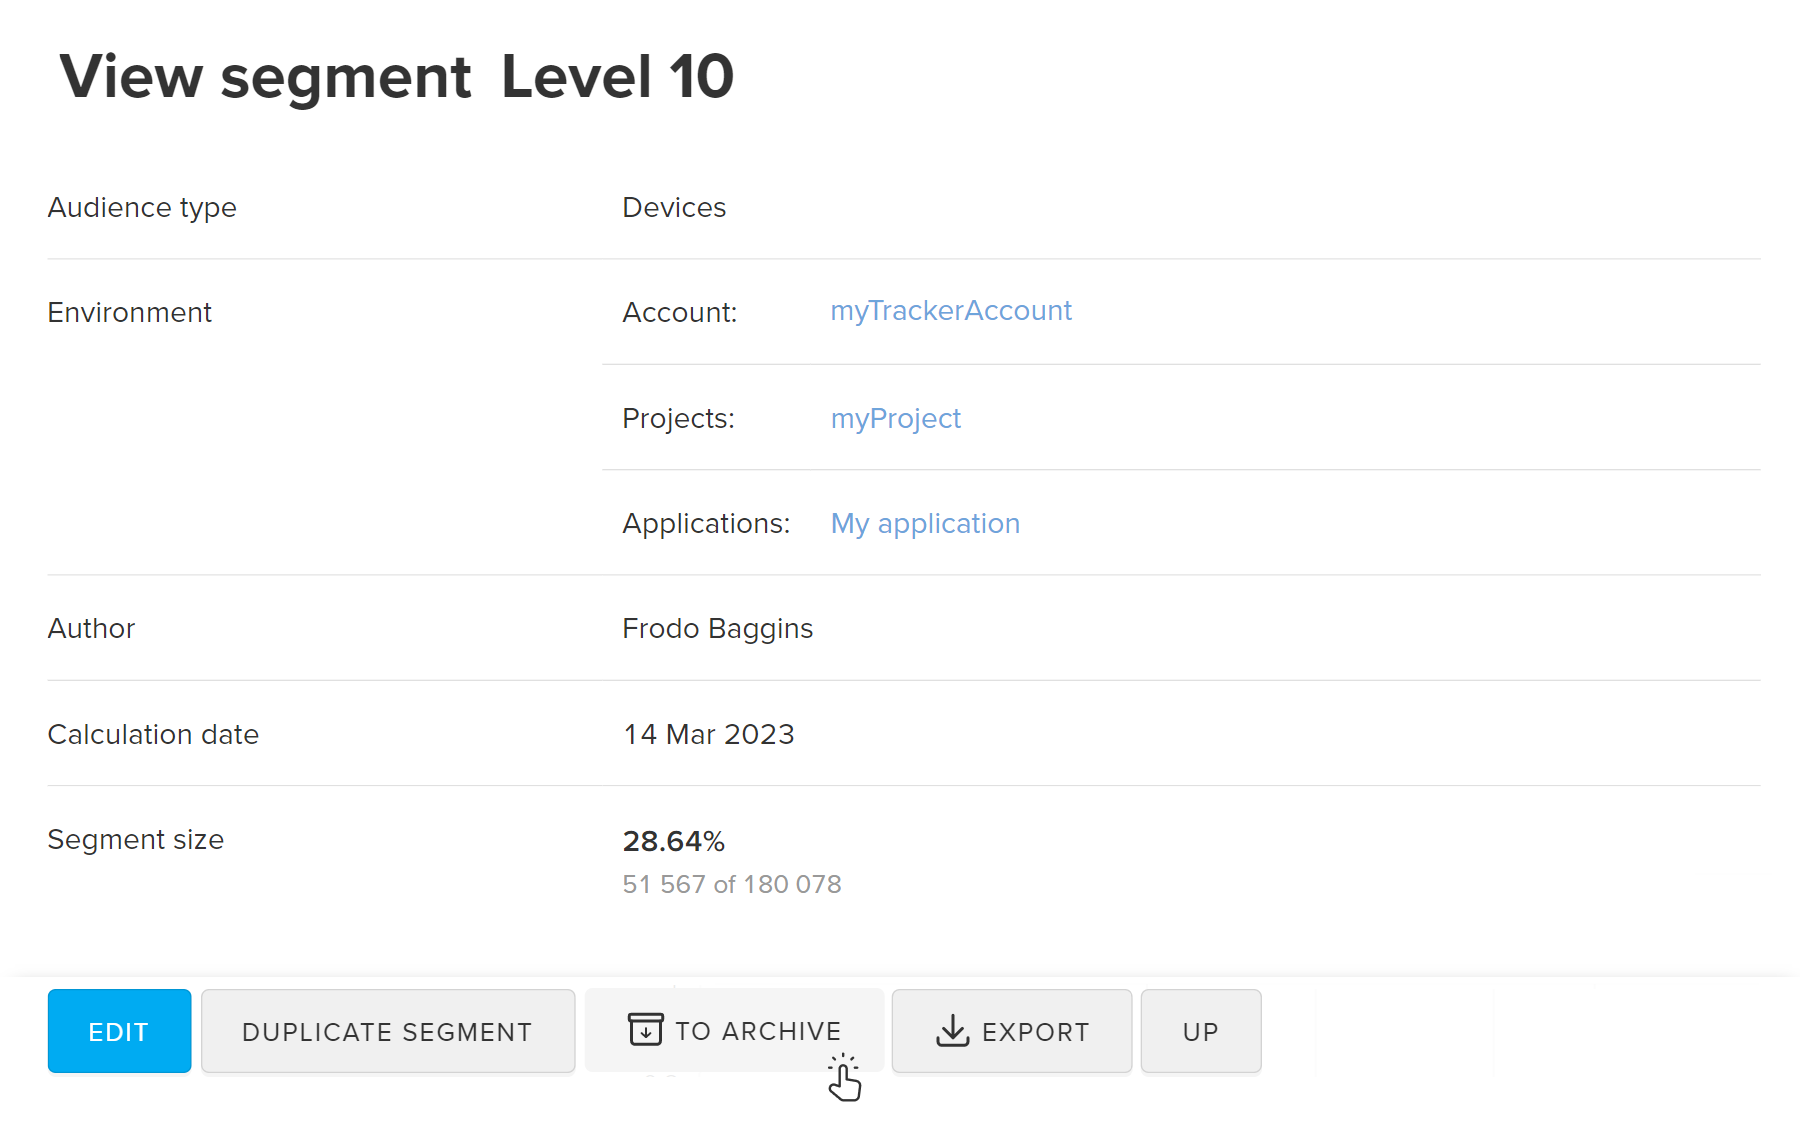
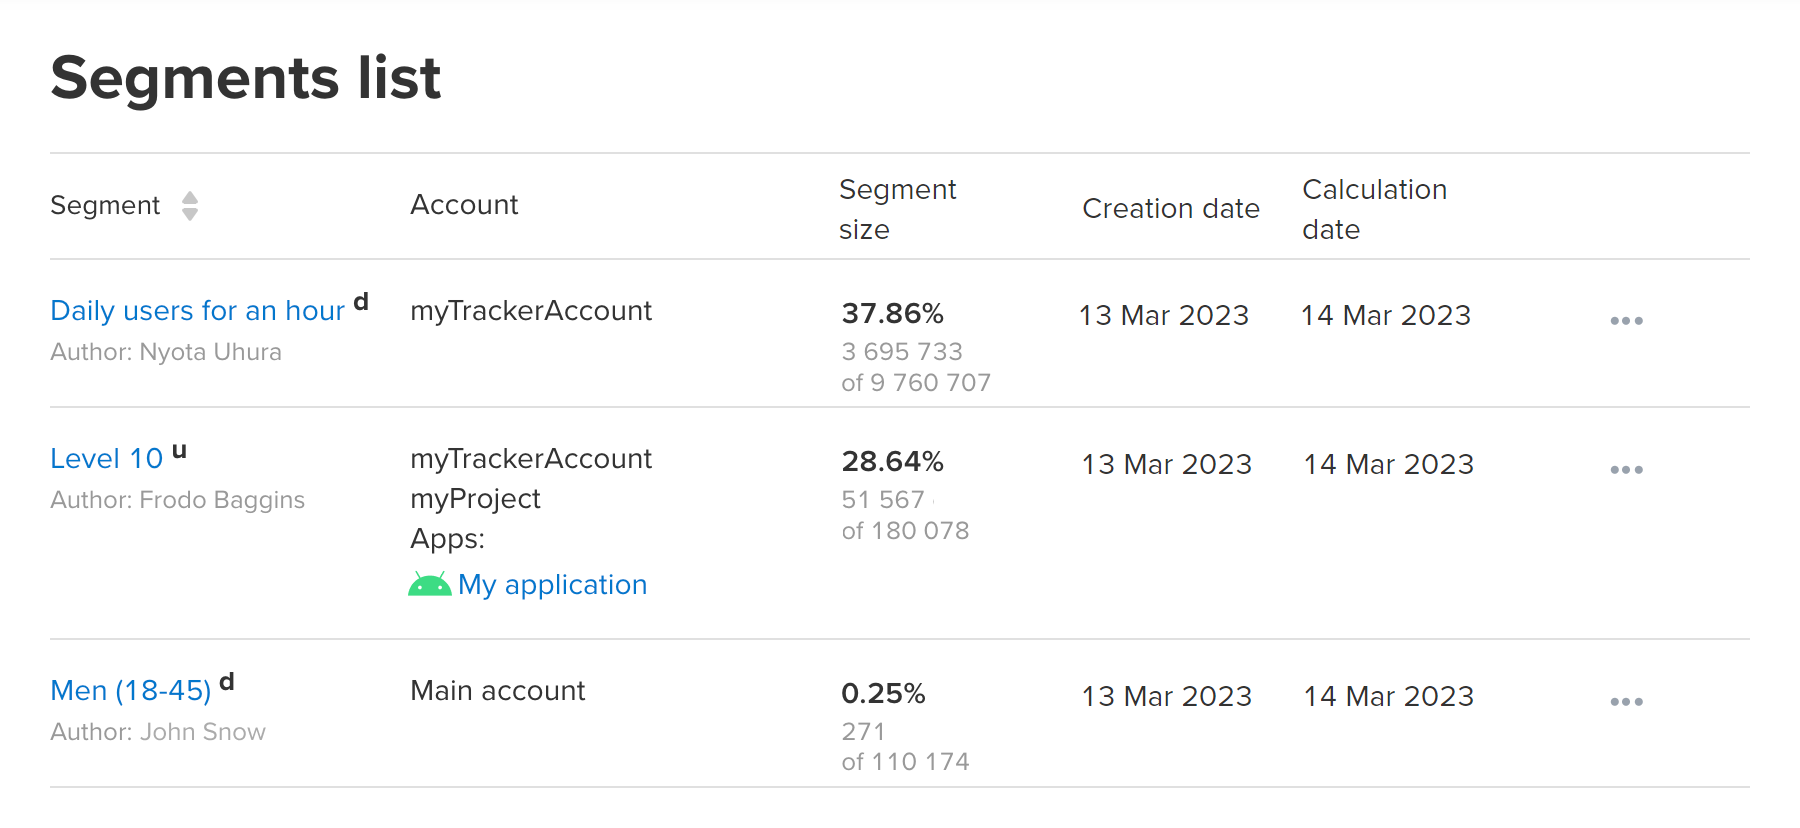
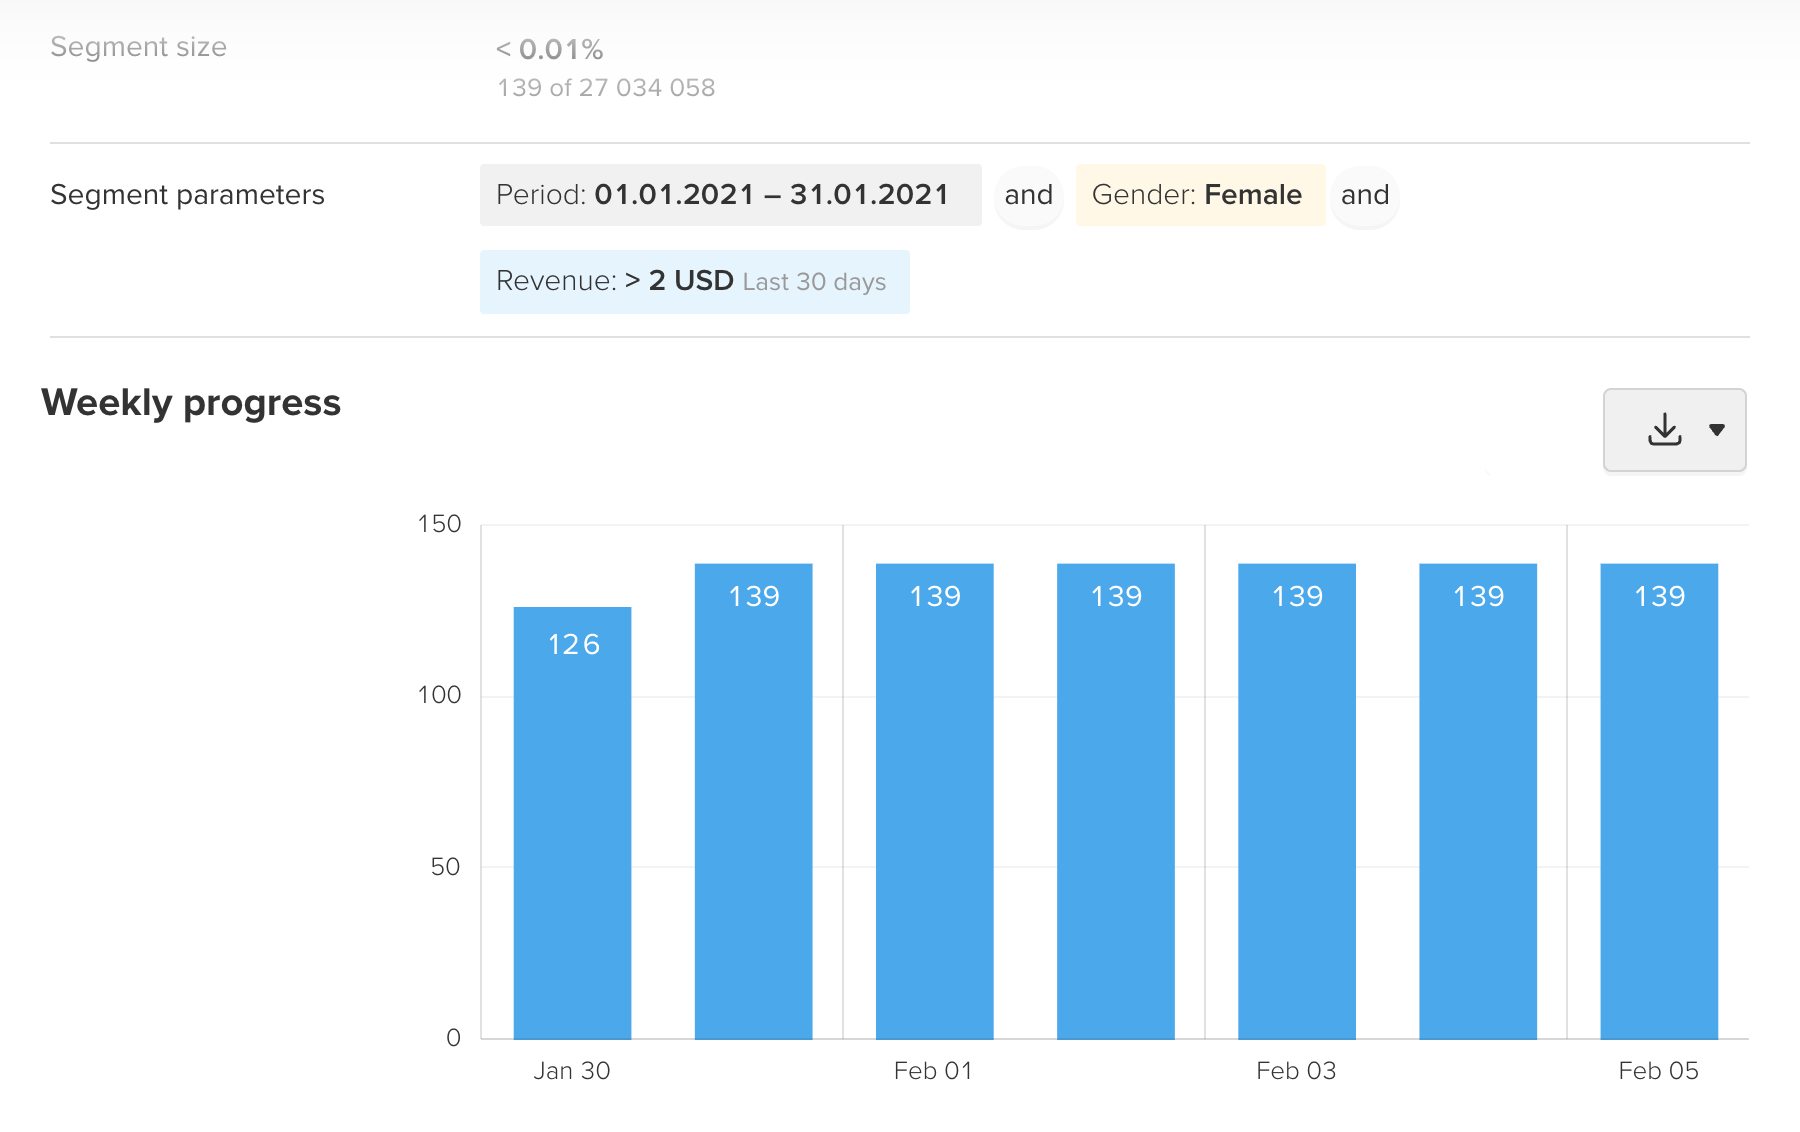
MyTracker calculates the segment size daily based on the parameters you have set. You can see the progress on the segment page. All key data, such as the segment size, calculation date, and linked apps, are available on the Segment list page.

Add segment

  1. In the Segments list click Add.
  2. You can use a ready segment as a basis. Open the segment page and click Duplicate segment.

  3. Fill out the form:
    • Title* — segment name that will appear in all lists and reports.
    • Audience type* — audience to be used for segment analytics: project users or their devices, or user accounts in the app on platforms such as VK Play and VK Mini Apps.
    • Remember that users can have one and more devices, and some switch or upgrade their devices.

    • Account* — the account to which the new segment will be added. If you have only one account, it would be selected by default. For more details, please see the Account section.
    • Projects — one or more app projects to be used for segment identification. For more details, please see the Project section.
    • Applications — one or more apps to be used for segment identification.

    * — required fields.

  4. Set the segment period: fixed period (for example, January 1-7) or a sliding window. By default, all segments are built based on the Last 30 days sliding window.
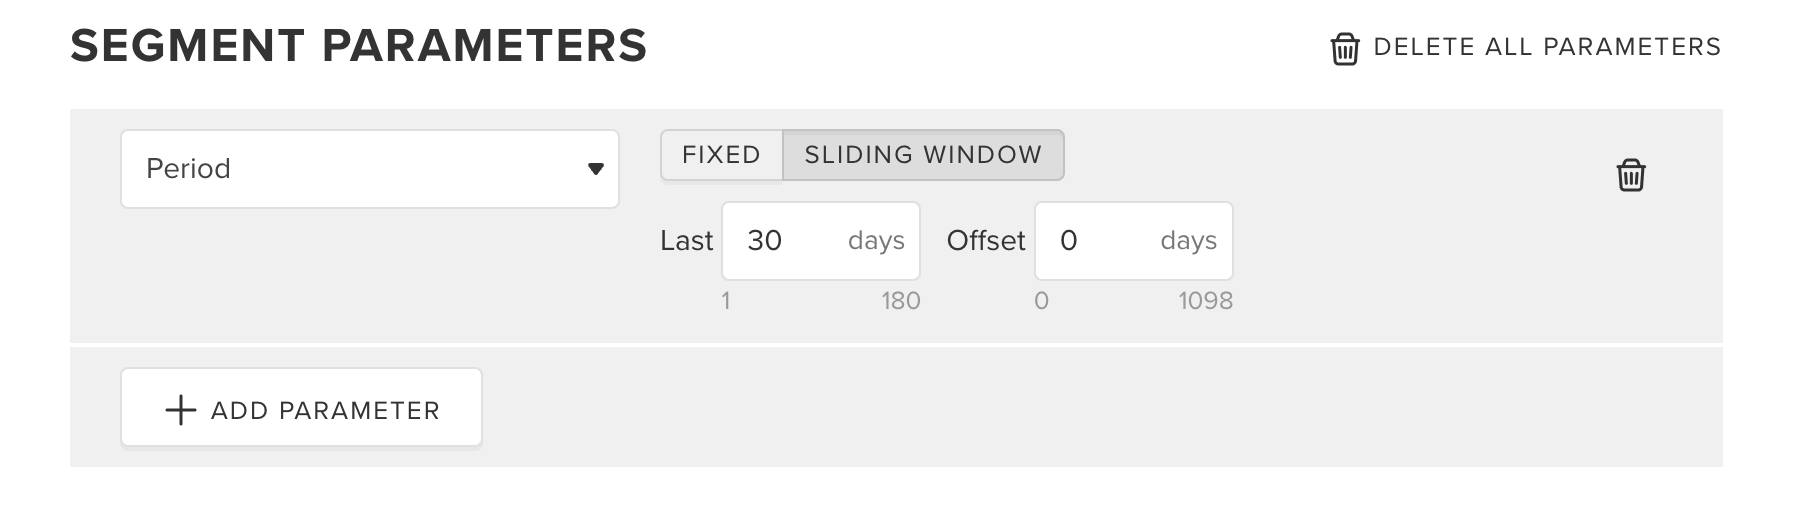
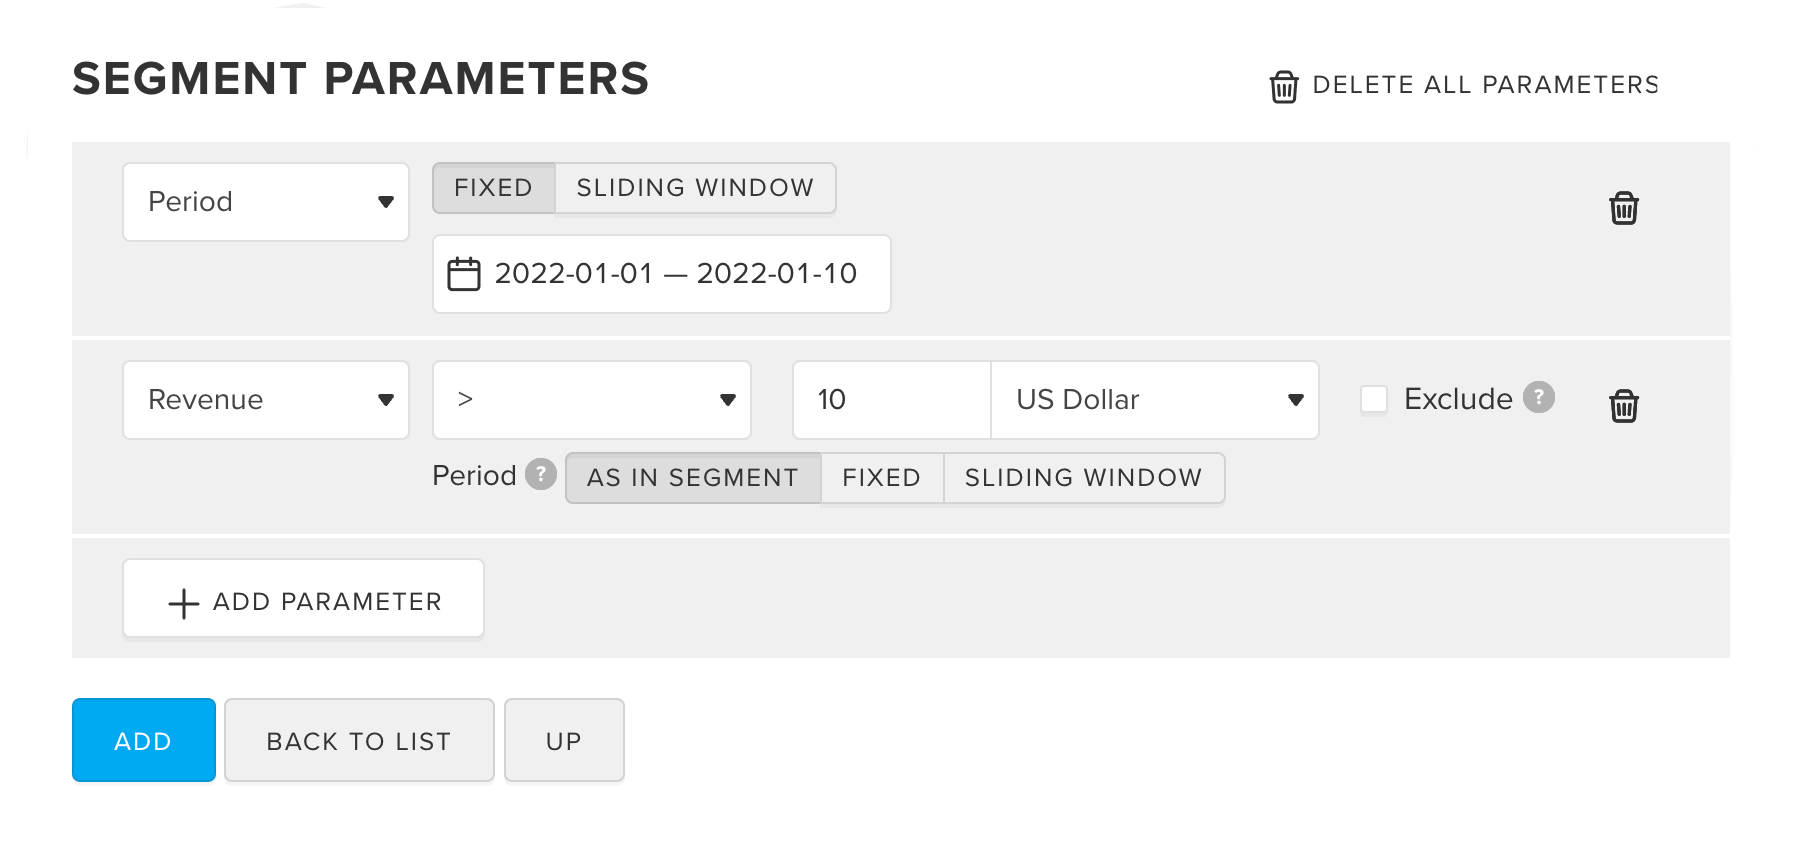
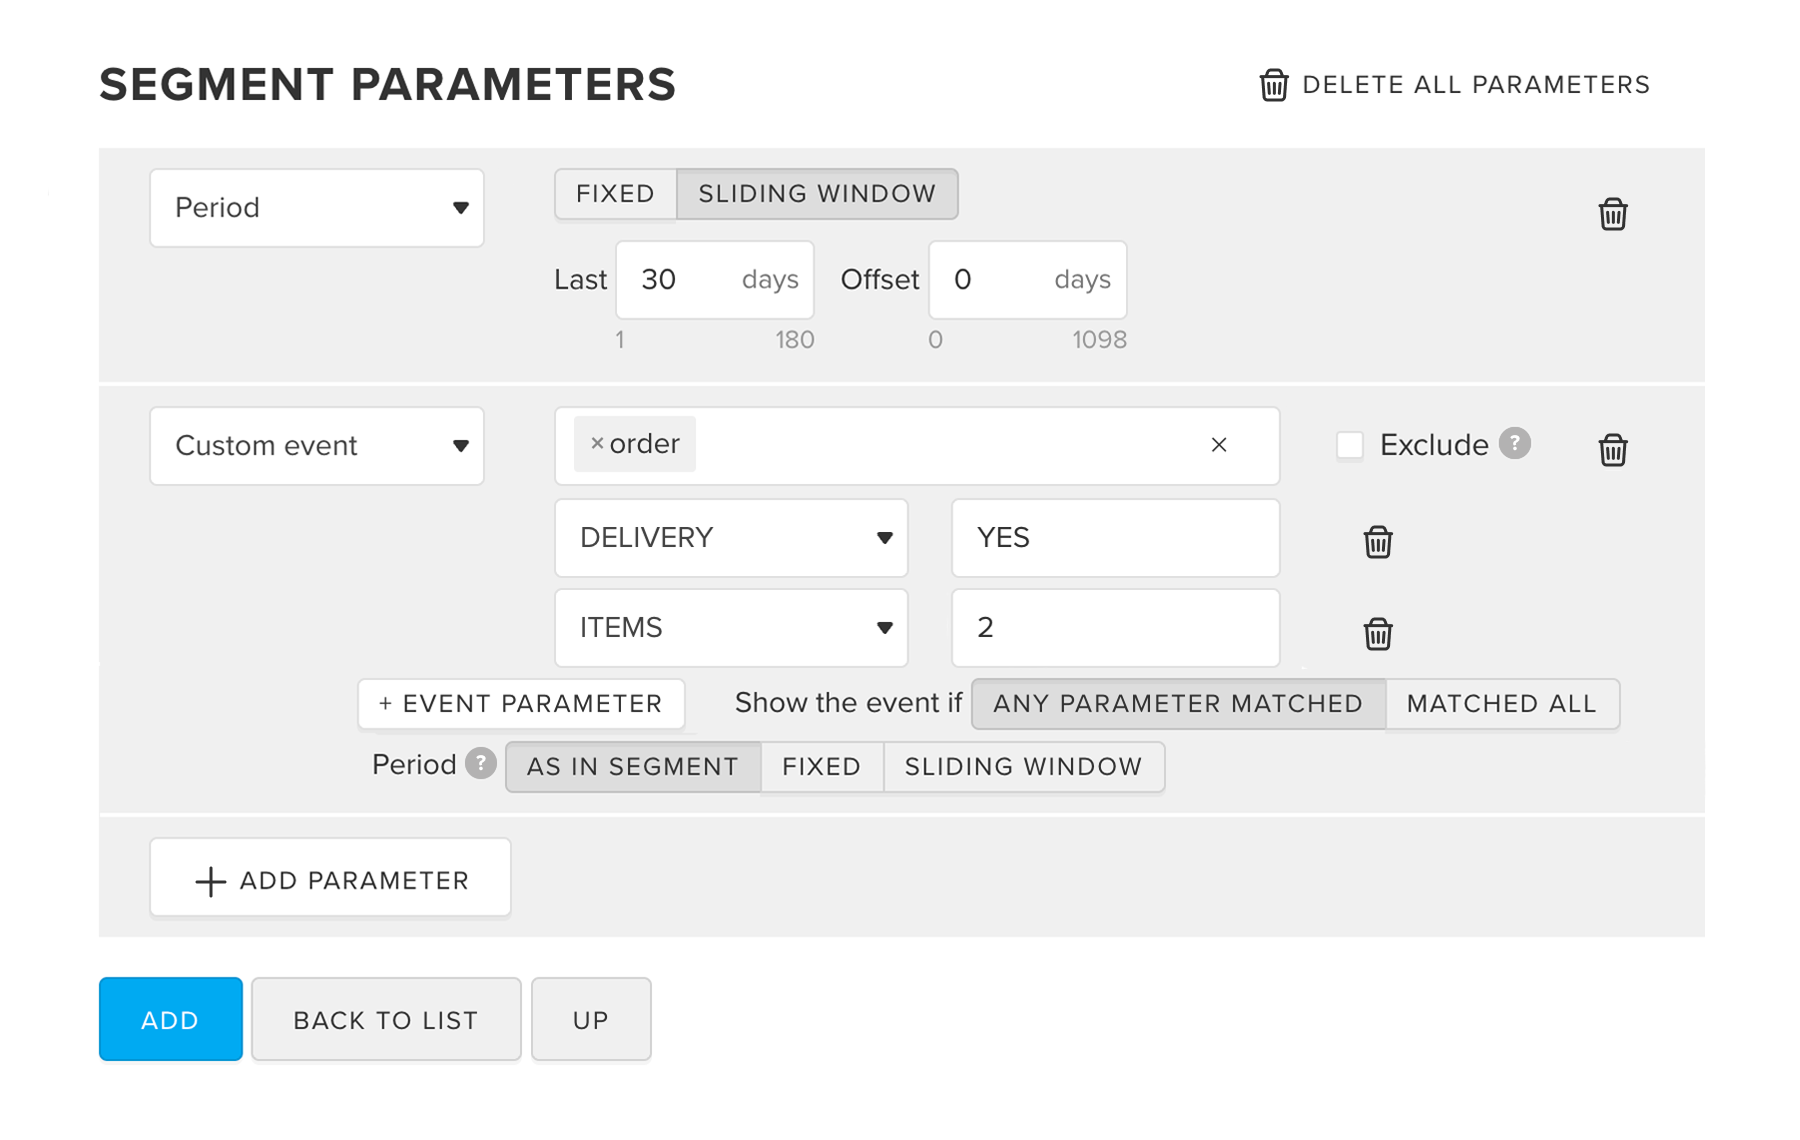
  5. In this step, you set the general period for the segment calculation. It can then be redefined for some parameters individually (Revenue, New Audience, etc.) via the Period condition

    For the fixed period, you need to select exact dates.

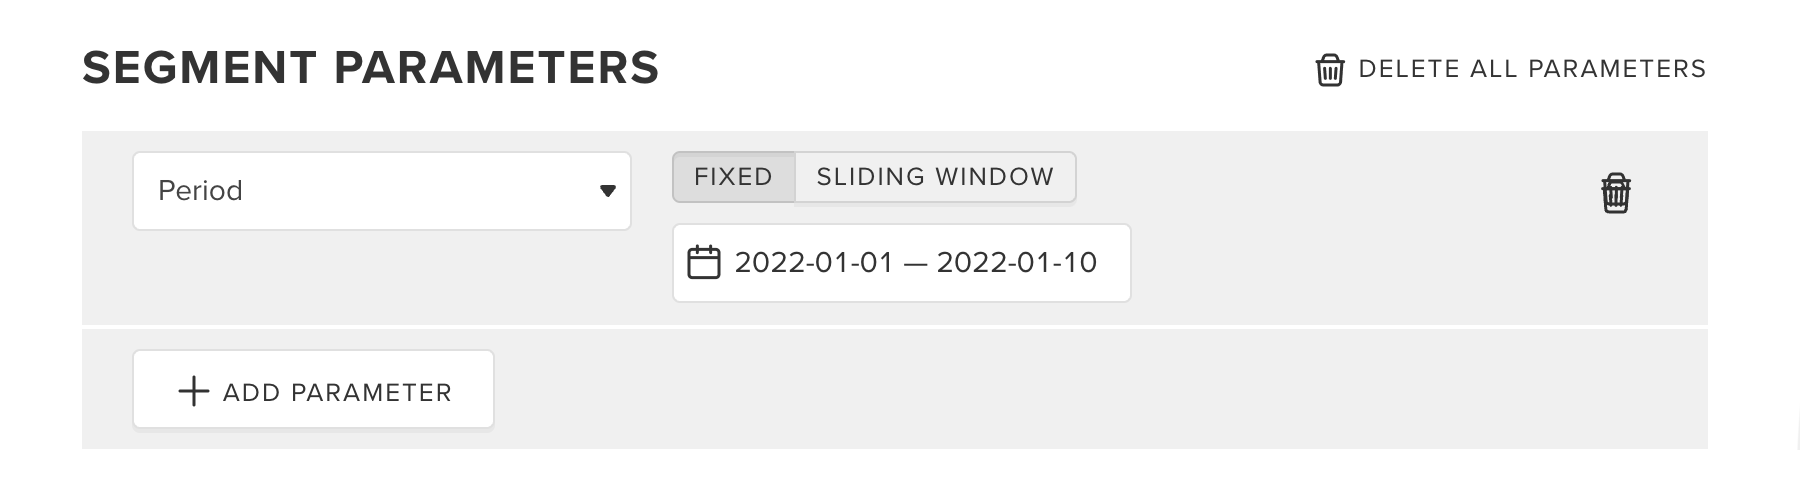
    For the sliding window, enter X days in the Last field and add the offset in the Offset field. 
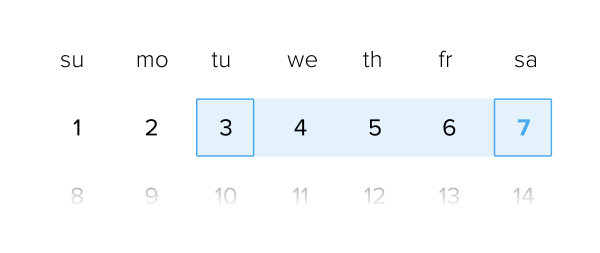
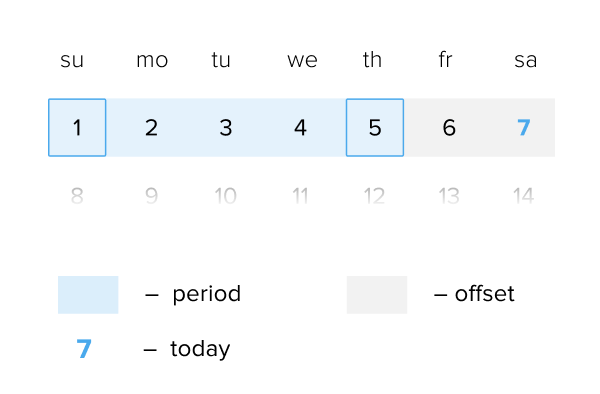
For example, if today is January 7, then the period for the last 5 days without offset will be January 3 to 7. The period offset by 2 days is January 1 to 5.

  6. Set other segment parameters:
    • Click Add parameter.
    • Select the parameter based on which you will form the segment (age, device model, etc.).
    • Set a parameter value or a comparison operator, or a parameter type.
    • For the Custom Event parameter, you can add one or more event parameters and specify their values. If you add several parameters, use the following option to configure their application rules: Show the event if any parameter matched/all matched.
    • You can set the following options:

      • Exclude to exclude a specified parameter from the segment (e.g. exclude users aged between 1 and 17).
      • Period to set a separate period for the selected parameter: fixed, sliding, or as in segment.
    • Repeat these steps to add on more parameters.
  7. Click Add. The segment will soon be calculated.

Analyze segment

To analyze segments, use the following options:

  • Track progress on the View segment page. For example, assess the number of female users who brought in the revenue of over USD 2 over the last 30 days. The chart below shows this criterion applies to 139 women out of 27 million app users.
  • Build a report on the segment using the Builder. To do that, select Other filters > Segment. For example, choose just one segment and a minimum number of selectors to identify the average session duration among female users who brought in the revenue of over USD 10 over the last 30 days.

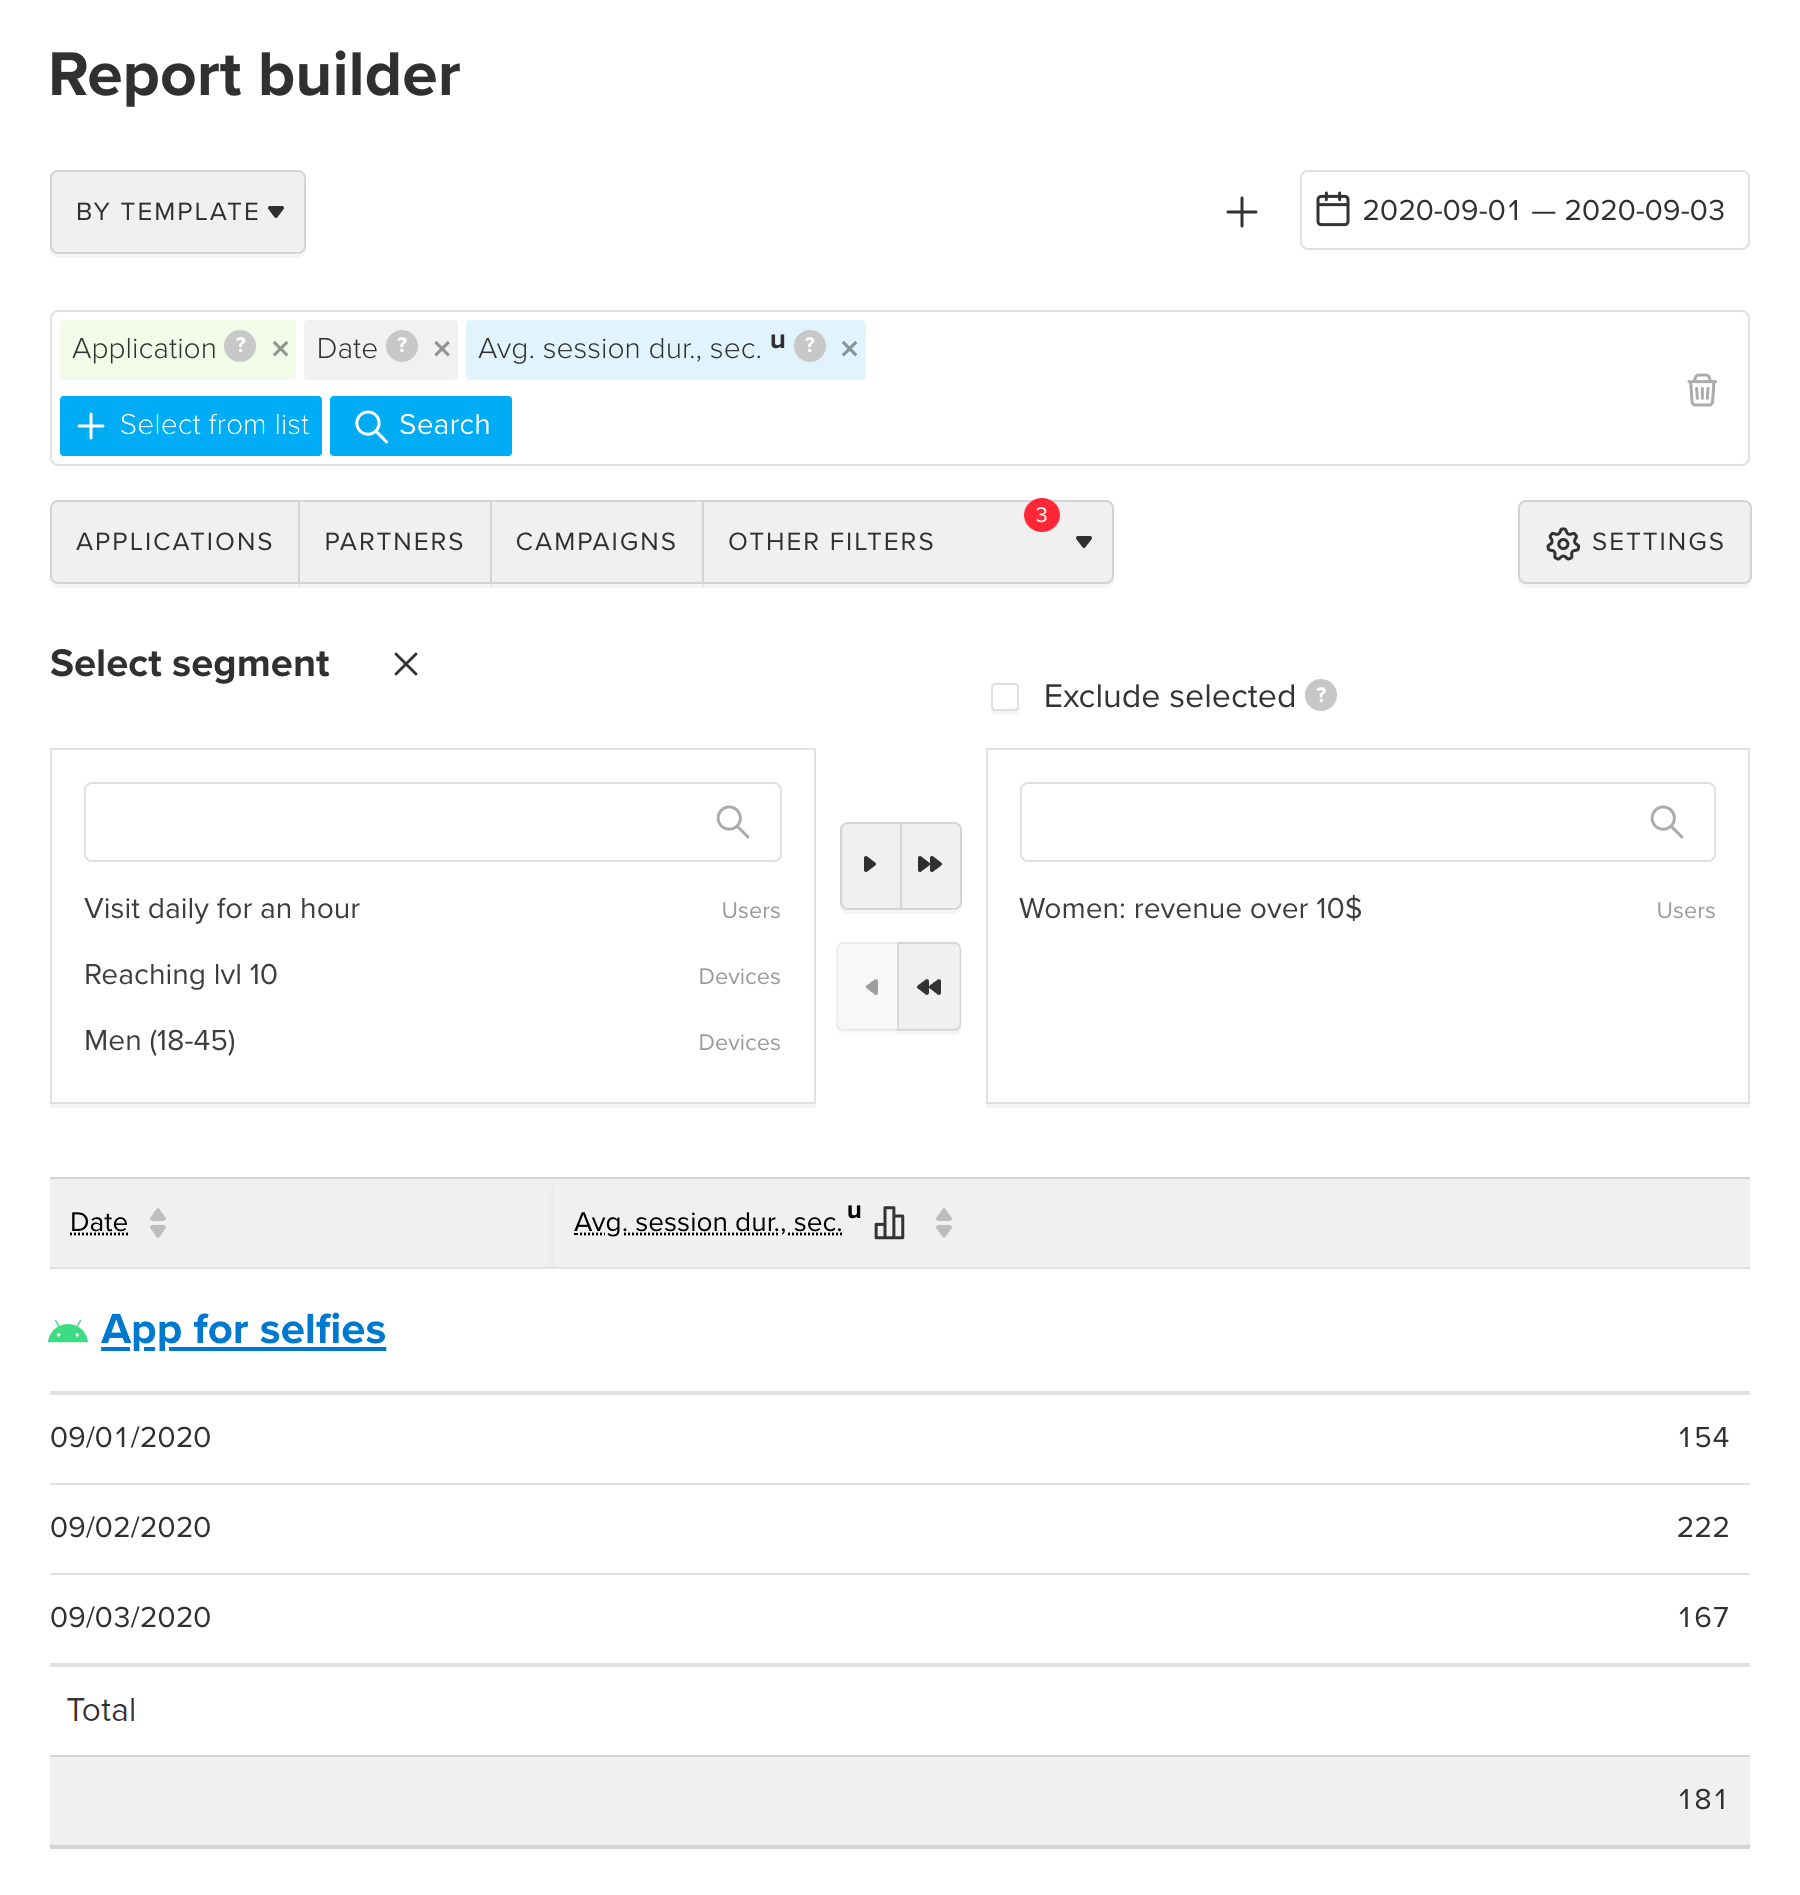
These are just a few use cases to get you started. For more details on MyTracker’s capabilities, please see the Analytics, Predictive analytics, and API sections.

Export segment

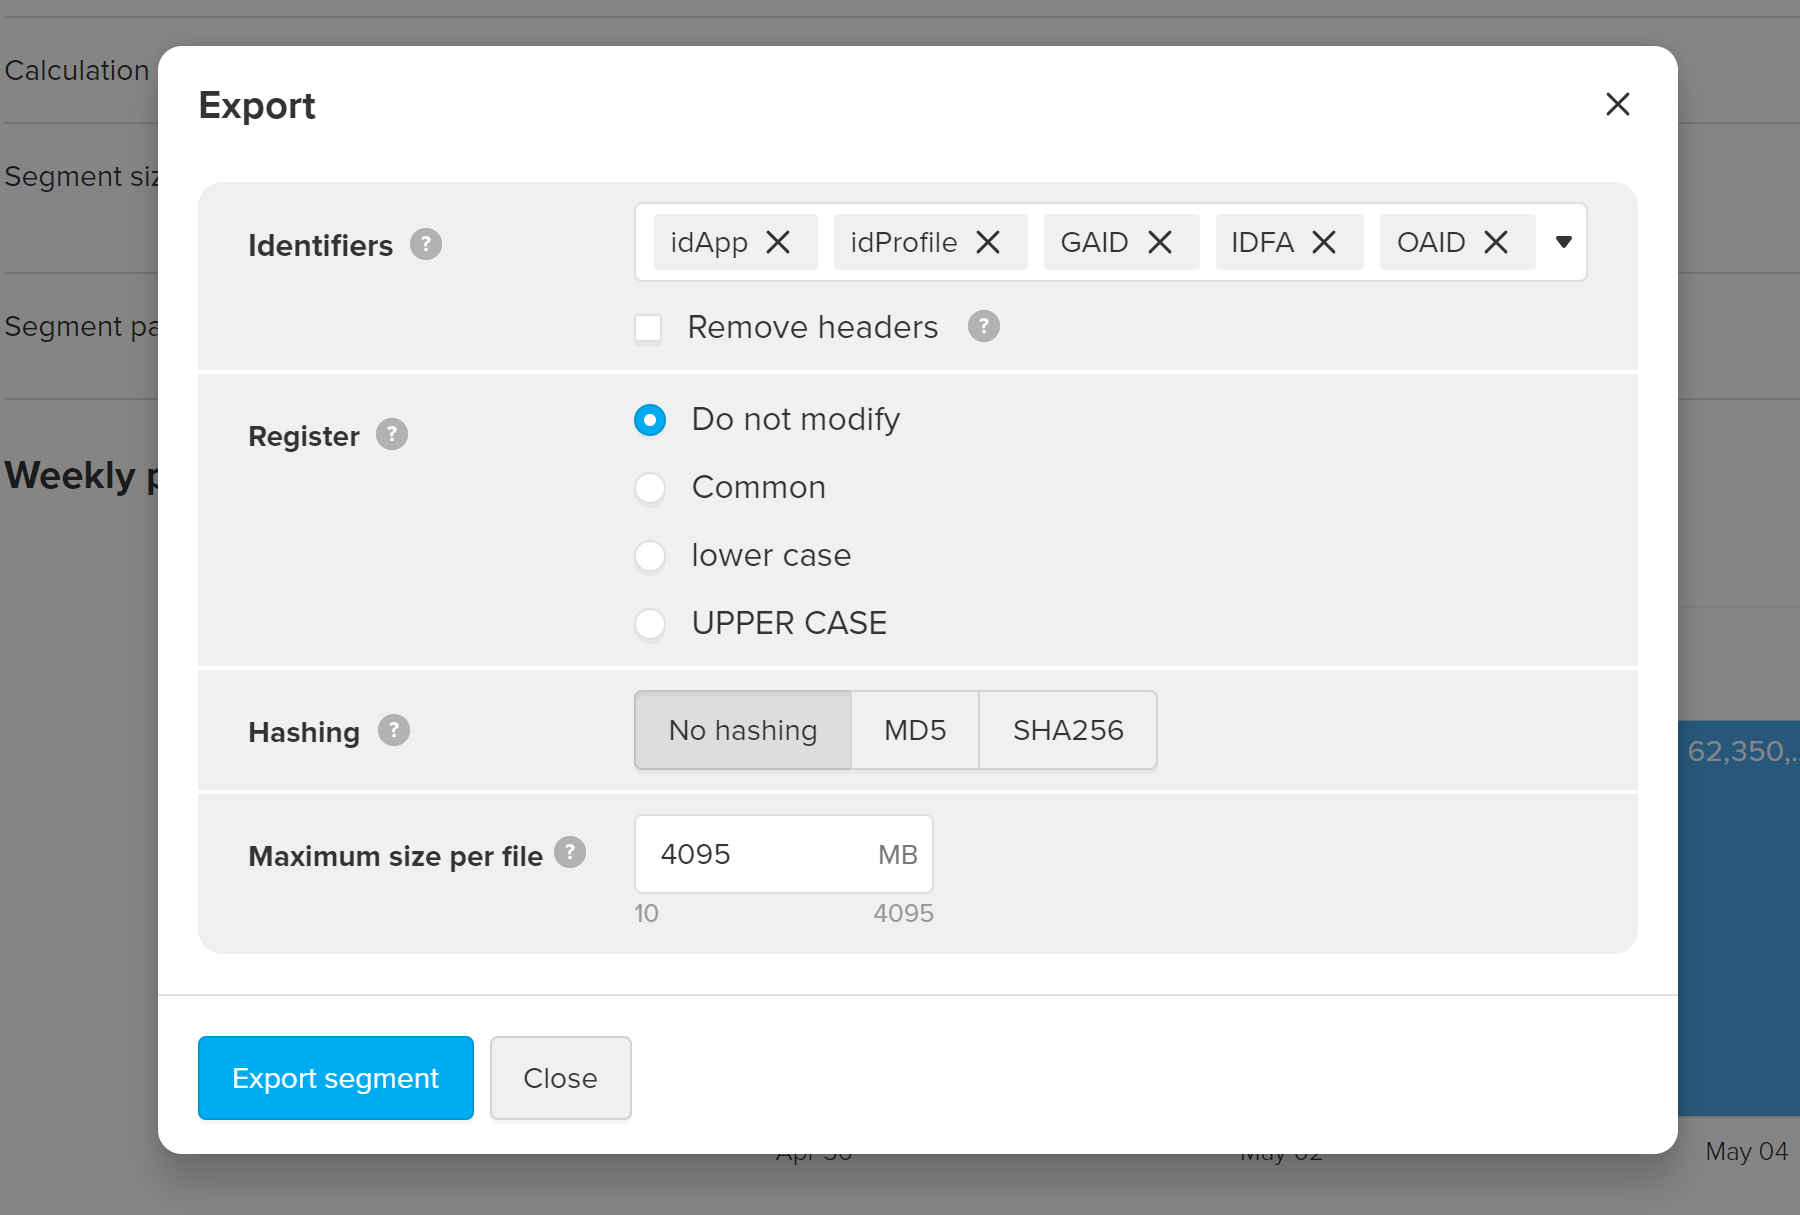
You can export the segment in the CSV file to get a list of identifiers of the specific audience. For instance, it can be IDs of the active users in a particular country or IDs of iOS devices with app install.

Only account owners and users with the granted export permission can export segments from the account. For details, see User management.

  1. From the segment list, select the segment and click Export on the page that opens.
  2. Under the General Data Protection Regulation (GDPR), the segment cannot be exported if it includes personal user data: gender, age

  3. In the form that opens, select identifiers for export (all are selected, by default). The list of available segments depends on the audience type:
  4. Segment by devices
    idApp App identifier in MyTracker
    idProfile Device identifier in the app. It defines a pair of app+individual device
    gaid Android advertising identifier (advertisingId)
    idfa iOS advertising identifier
    oaid Huawei advertising identifier
    Segment by users
    idProject Project identifier in MyTracker
    idProjectUser User identifier in the project. It defines a pair of project + user (idProject + CustomUserId)
    CustomUserID User identifier sent via SDK. It defines an individual user
  5. Turn on the Remove headers option if you need to exclude column headers from the file. The column header is the first row with identifier names.
  6. In the Register drop-down list, select the required configuration, if you want to set a register for the IDFA, GAID, OAID identifiers. The following register variants are available:
    • Do not modify (default) — identifiers will be exported in the register they have when entered the system;
    • Original — identifiers will remain in the register recommended by the device manufacturer:
      • IDFA — in upper case
      • GAID — in lower case
      • OAID — in lower case
    • Lower case — lower case will be applied to identifiers;
    • Upper case — upper case will be applied to identifiers.

    For other identifiers, the register configuration is not applied.

  7. Use the MD5 or SHA-256 algorithm from the Hashing drop-down list, if you need to hash user or device identifiers when exporting a segment (default option is No hashing). Hashing is available for the following identifiers:
    • IDFA;
    • GAID;
    • OAID;
    • CustomUserID.

    Other identifiers remain unhashed.

  8. Use the Maximum size per file field, if you want to export a segment into multiple files of a particular size. Each expanded file from the export file corresponds to the size specified in the field. This helps improve the subsequent identifiers' transfer to advertising networks, limiting file sizes for the uploaded files.

    By default, the field headers will be added only to the first file. If you select the Remove headers option, the field headers will be removed from all files.

    In MyTracker, you can set the file size from 10 to 4 095 MB.

    Enter 0 or leave the field blank if you do not want to export a segment with multiple files.

  9. Click Export. As a result, you will get a CSV file inside the GZ archive or ZIP-archive containing multiple files. If the file is too large, we will send you an email with a link to the file.

You can use downloaded identifiers in your option: send push notifications, pass IDs to the partner or in your analytics system, and so on.

The segment size may differ in the downloaded file and the interface for several reasons:

  • after exporting the segment, new data appeared in the interface;
  • no IDs were found (blank lines will be removed from the file);
  • repeated idProfile was found (the line with the same idProfile will be removed from the file).

You can export the segment using the Export API. Learn more

Archive segment

If a segment is not used or has been created by mistake, it may be archived. Archiving comes in handy when you have numerous segments. Archived segments are marked as Archived and moved to the bottom of the list, with no further daily calculations made for these segments.

To move a segment to the archive, click To archive on the view segment page. To restore a segment from the archive, click Restore.

Was this article helpful?