You can add a path based on an already saved path.
To do this, open the path page and click Duplicate path.
General info
Select field values and configure filters:
Account — to which the new path diagram will be added.
If you have only one account, it will be selected automatically.
Project — on which apps the path will be built.
App — on which the path will be built. By default, all project apps are selected.
You can select one or more apps and remove unnecessary ones.
Audience type — physical devices or authorized users.
Filters that allow you to build a path based on a specific country, region,
gender and age of the audience, partner name, campaign, and more.
Period for which the user path will be built.
The period is the time interval during which your audience completed
events or navigated through the pages of the site or app.
Selecting a key node and calculating the diagram
Select the direction of the path: from or to the key node.
Select the key node: system event, custom event, or page URL.
If you are building a path by visited pages, enter the page URL in the field.
This page will become the key node on the diagram.
The data transfer protocol https is optional.
If you are building a path by completed events, select an event from the drop-down list.
For custom events, make sure that MyTracker receives them.
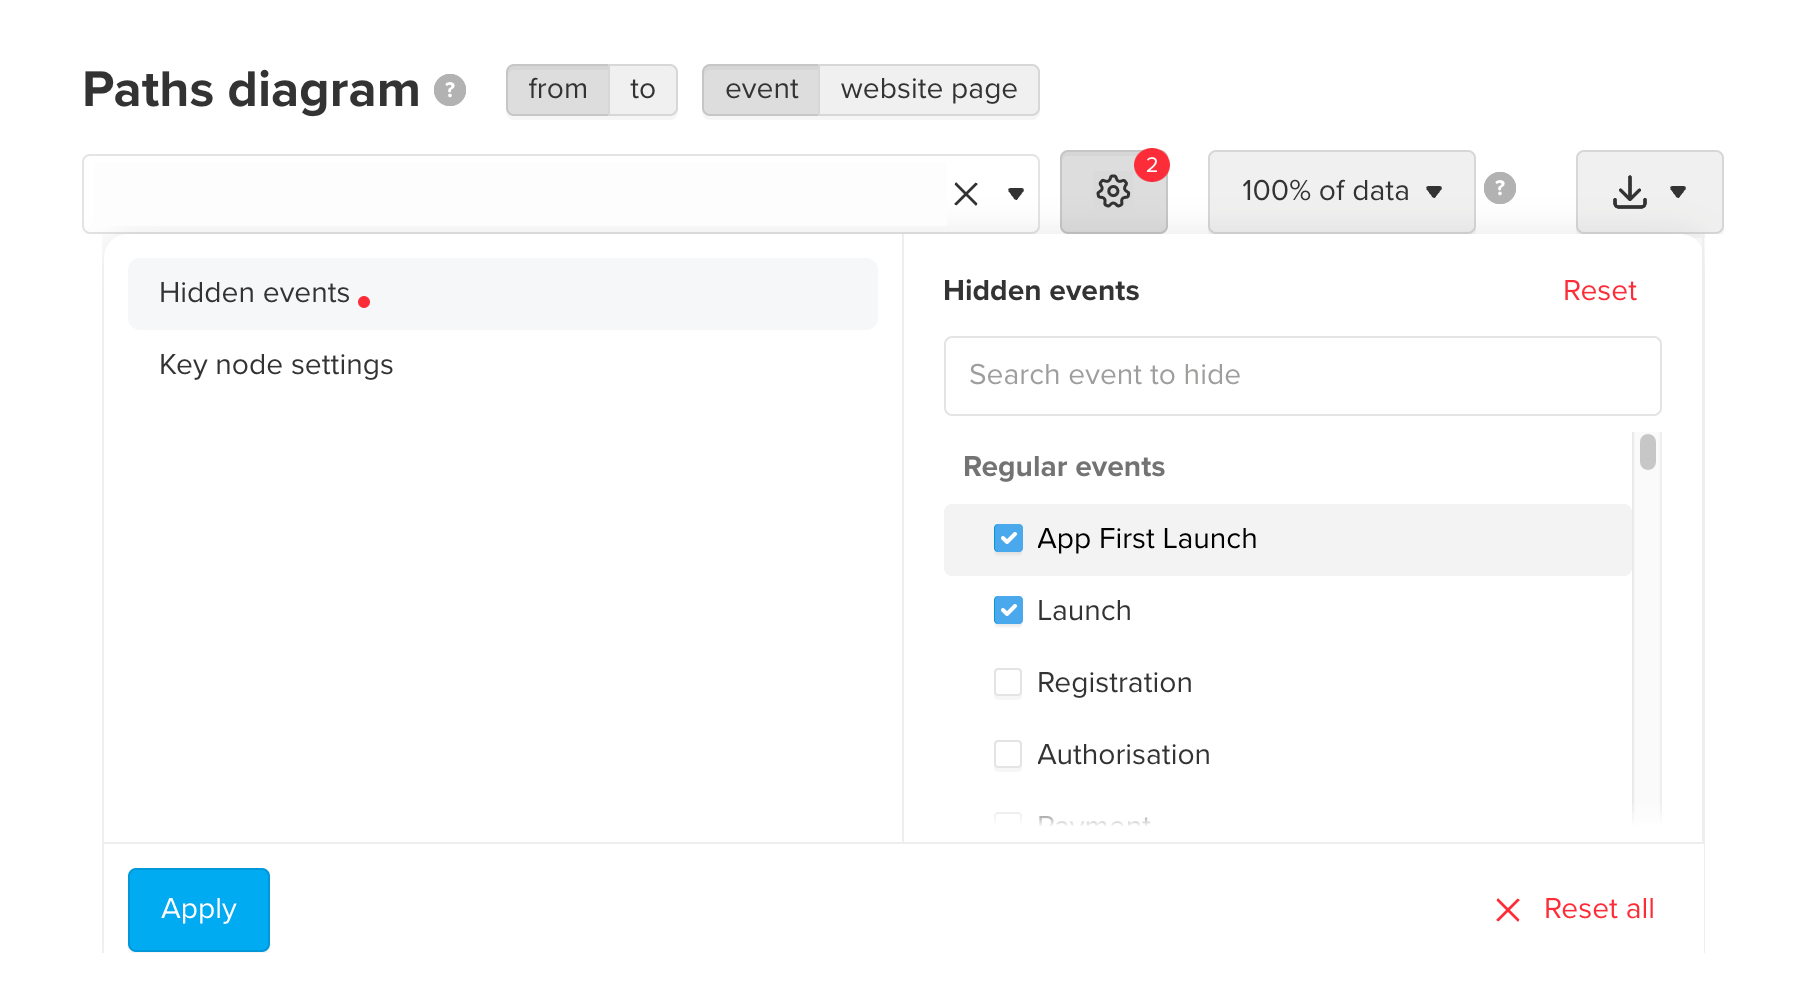
(Optional) You can hide events and website pages so that they do not appear on the diagram and are not included in the calculations.
To do this, click :
In the Hidden events list, select system or custom events;
In the Hidden URLs list, specify URLs.
(Optional) You can configure the key node of the diagram by setting parameters for custom events or URLs that will be used to build the diagram.
To do this, click , add event parameters or URLs to the Key node settings list, and specify their values.
When adding multiple parameters, the Show if any matched/all matched option can help configure their application rules.
(Optional) If your project has a large data volume and diagram calculation takes a long time,
use sampling.
Set the high percentage for more accurate results, or lower it to speed up the calculation.
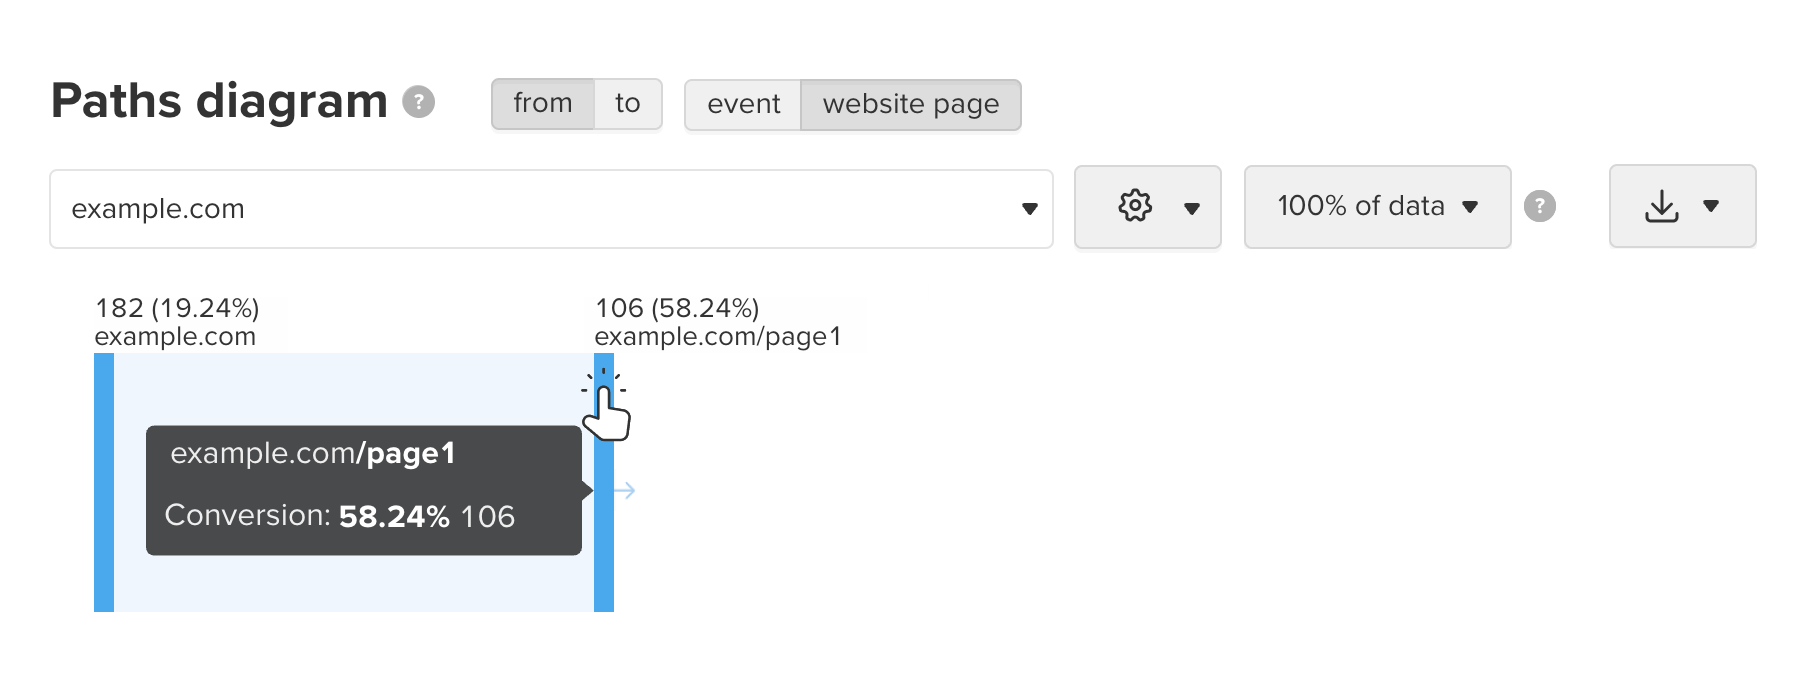
Click Calculate, and MyTracker will build the first two steps of the diagram.
Click on the nodes, as shown in the figure below, to unfold the path and analyze it.
To collapse the path, click on the node again.
(Optional) Name the diagram. This step can be skipped. The path name will be set automatically,
depending on the selected conditions. For example, the path from the site page will be named "FROM example.com".
(Optional) You can export the diagram to PDF, PNG, or SVG.
To do so, click and select the file format.
Click Save.
To learn how to interpret the diagram, see Path analysis