Log in

Raw data export

MyTracker allows you to export raw data, without processing and aggregation, in the form it was received from the SDK or web counter. Use the data as a base for third-party analytics systems, CRM platforms, self-processing, and analysis of user experience.

Monitor the status, copy settings, and download data from the interface without API requests.

You can export the raw data using the Export API. Learn more

Only account owners and users with the granted export permission can export raw data from the account. For details, see User management.

Export statuses

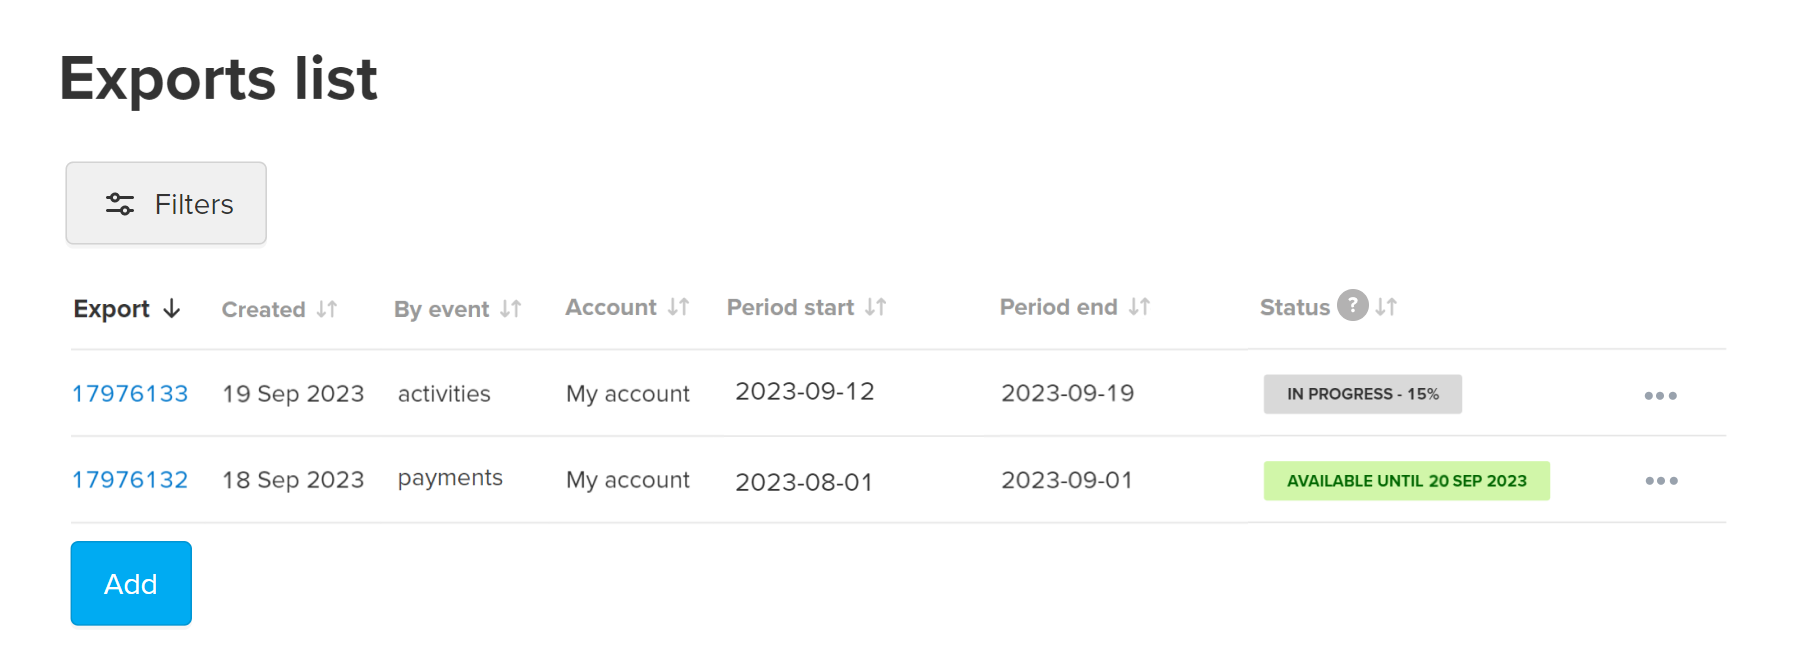
The exports list includes only exports created in the last 30 days. After adding an export, you can track its status:

  • In progress means that the file is generating.
  • Available until indicates that the file has been successfully generated and will be available for download until the specified date.
  • Retention period expired means that the file is no longer available for download. You can duplicate the export to generate a similar request.
  • Failed indicates that the file cannot be exported for one of the following reasons:
    • An error occurred on the server side. You can restart exporting later.
    • Too many lines in export. Try reducing the period and adding more filters.
    • Too much export data. Try reducing the number of fields.
  • Find out the specific reason of the error by clicking on the icon next to the status.

  • Canceled by user means that the export is canceled via MyTracker Export API request.

If the export is empty you will see the icon next to the status Available until. This means that there is no data for the specified export conditions. Try to create a new or duplicate the current export for a longer period and with fewer filters.
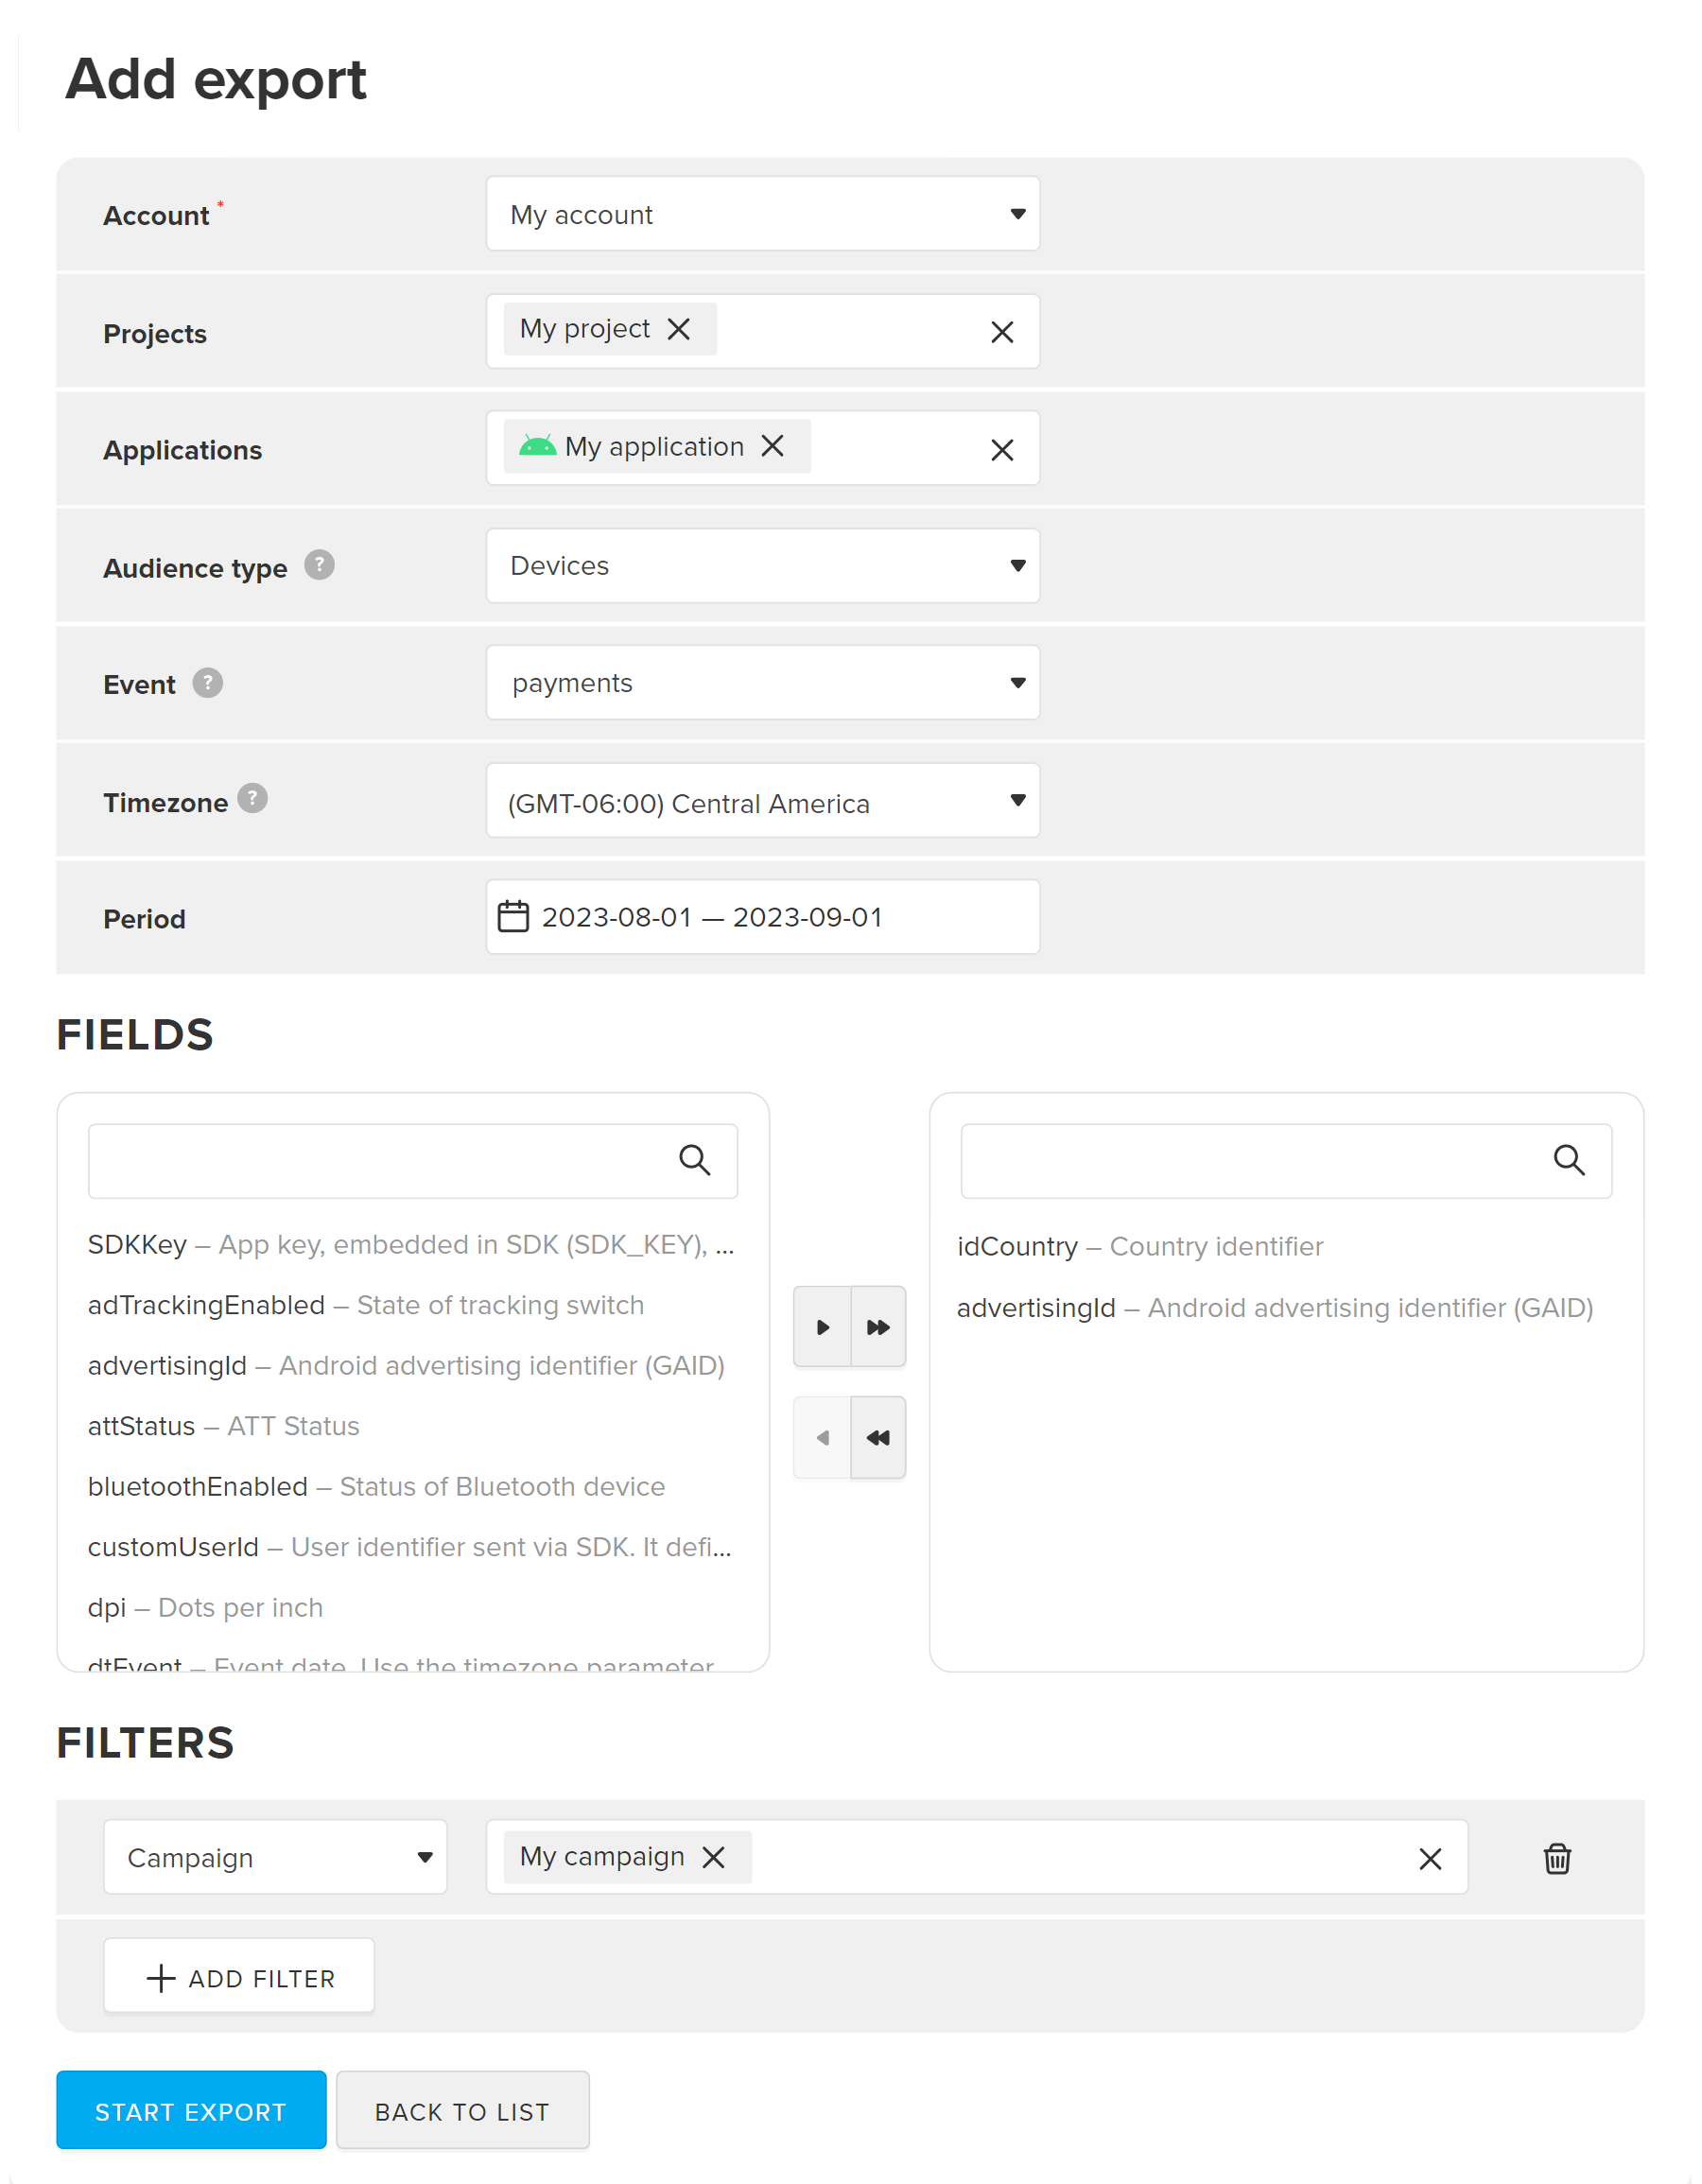
Add export

  1. In the exports list click Add.
  2. Fill out the form:
    • Account* — the account for which the data will be exported. For more details, please see the Account section.
    • Projects — one or more app projects for which the data will be exported. For more details, please see the Project section.
    • Applications — one or more apps for which the data will be exported.
    • Audience type — the audience to be used for export analytics: project users or their devices, or user accounts in the app on platforms such as VK Play and VK Mini Apps, and other — event data not tied to devices or users.
    • Event — the event on which the data will be exported. MyTracker provides raw data in its initial form, tied to a specific event. For example, an app installation, page view, or payment. See the full list of events in our documentation.
    • Timezone — the timezone in which the data will be exported. The default is the value specified in your profile settings.
    • Period — the time interval for exporting data.

    * — required field.

  3. In the Fields block, choose the selectors that will be exported. The list of fields depends on the selected event. See the full list in the documentation.
  4. In the Filters block, set filters on the export. The list of filters depends on the selected event. See the full list in the documentation.
  5. Click Start export.

The generated export will be available for download until the date specified in the status Available until.

Show API request

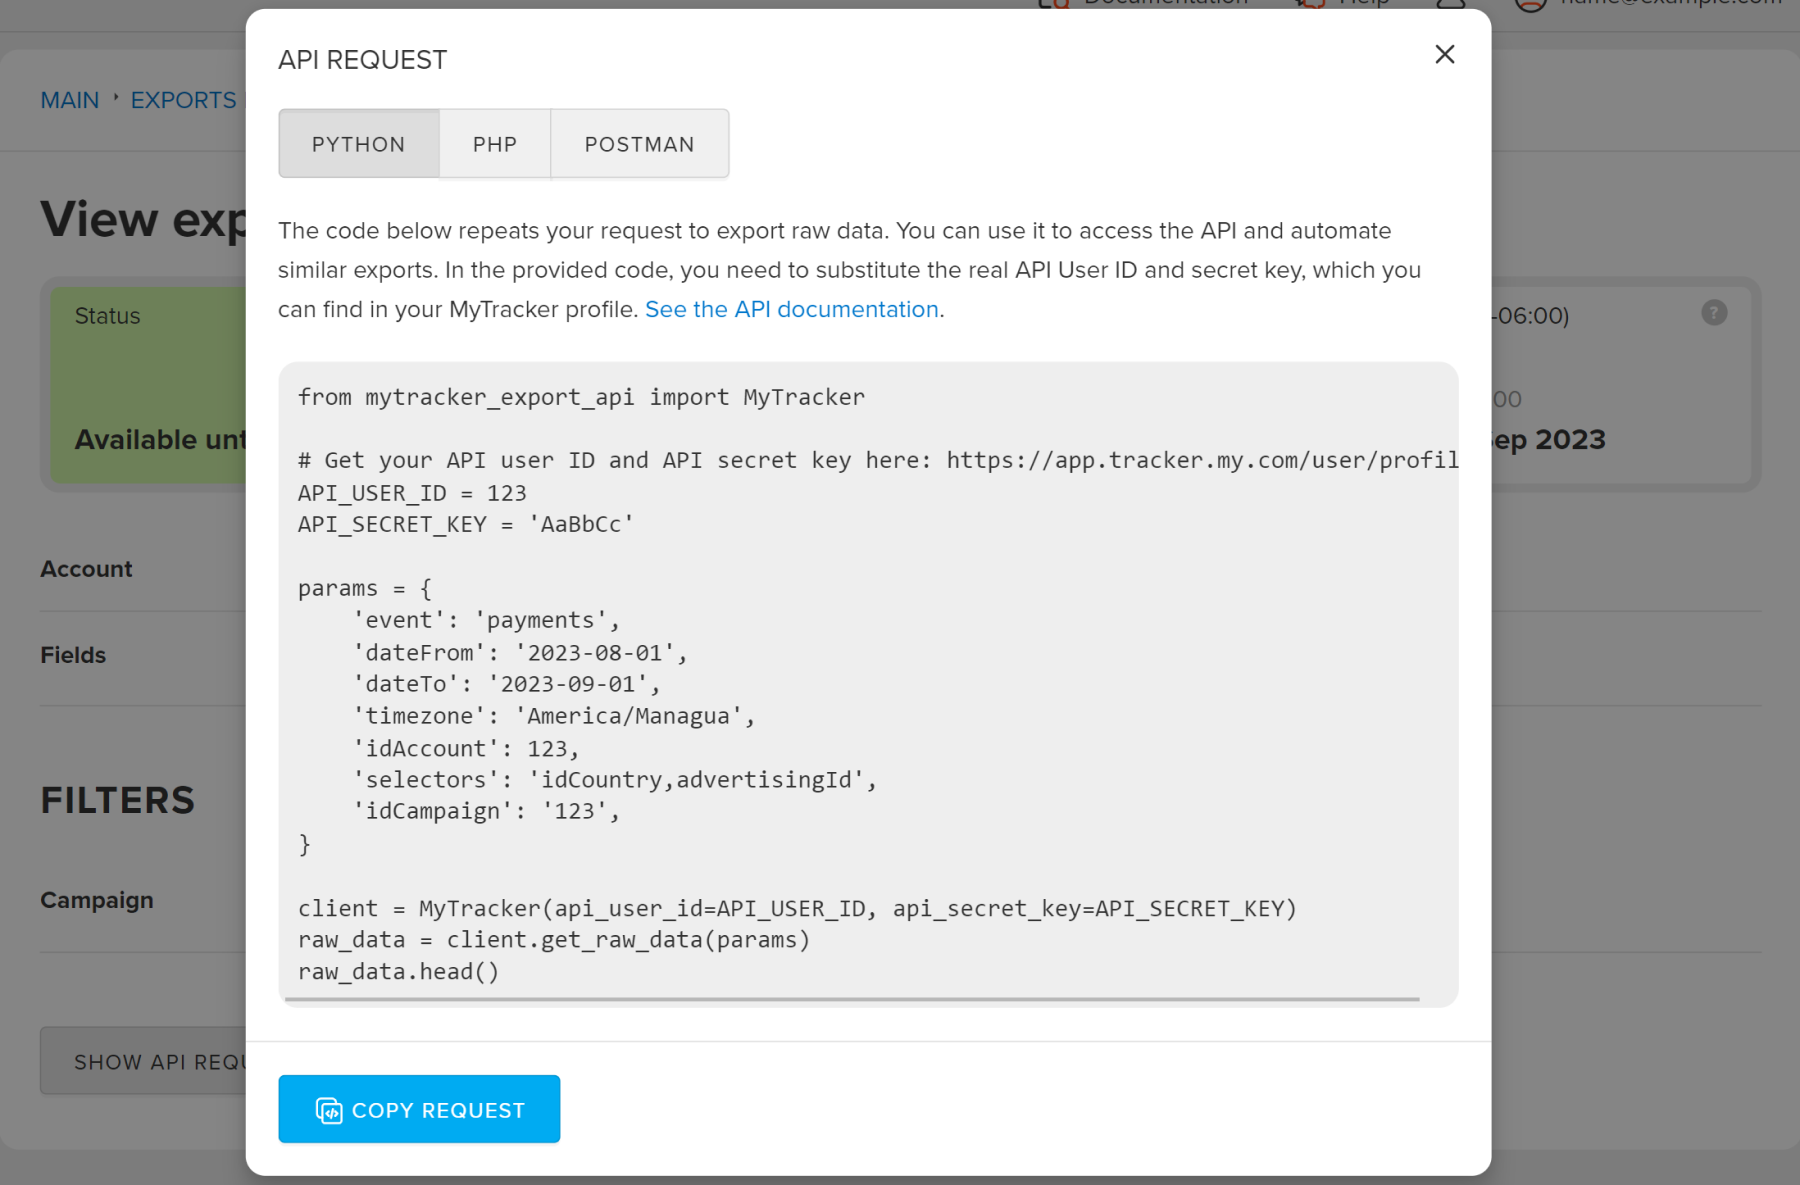
The API request is available only after you start exporting. Click Show API request on the export view page to see the request code in Python and PHP.

You can copy the code to access the API and automate similar exports. In the provided code, you need to substitute the real API User ID and Secret key, which you can find in your MyTracker profile. For more details, see the Raw data section.

Go to the Postman tab to see the link to the MyTracker Export API collection with request templates.

Duplicate export

Use the duplicate function to generate a similar request. For example, if the retention period of the export has expired and the file is no longer available for download, or if an error occurred during the export.

To duplicate the export:

  1. In the exports list select the export for duplicate.
  2. Expand the list of actions and click in the exports list or Duplicate export on the export view page.
  3. The form that opens will be filled in automatically, you can change the settings if necessary.
  4. Click Start export.

Download export

You will get CSV files compressed to gzip.

To download the export:

  1. In the exports list select the export for download.
  2. Expand the list of actions and click in the exports list or Download on the export view page.
  3. Wait for the file to download.

Large files can be split into multiple pieces, a window will open with links to download each file. The file name will contain the export number and the name of the events for which the data was requested.

Was this article helpful?